Saturday, February 1, 2020

Pre-Ride Motorcycle Inspection

Pre-Ride Motorcycle Inspection

It’s a beautiful day, the sun is shining, the wind is hardly blowing, and you are ready to hit the open road for a day of riding. Before taking off there are a few things you need to do to ensure your motorcycle is as ready as you are to hit the road.

Pre-Ride Motorcycle Inspection

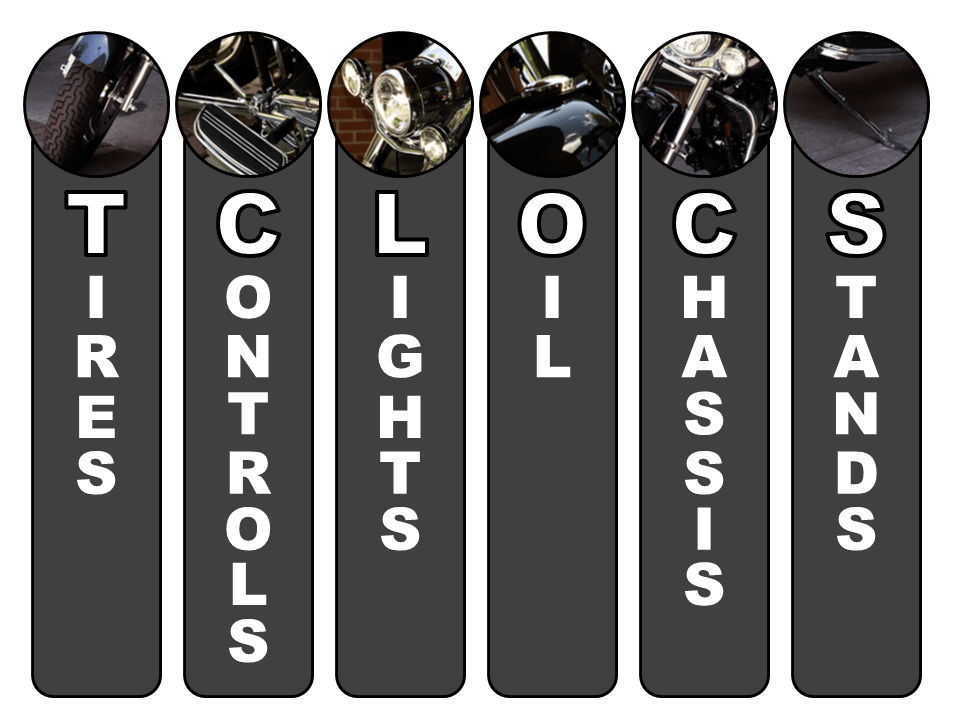
TCLOCS is an acronym that helps to cover the bike from stem to stern, for a quick inspection:

T- Tires and Wheels

  • Tires- Check tread depth, wear and air pressure
  • Wheels- See if any spokes are loose or if the rim is bent or cracked. See if it turns freely, but is not loose on the axle.

C- Controls

  • Inspect levers. Verify they are not bent or broken and move easily.
  • Check cables for fraying and lubricate them.
  • Check hoses for cracks, leaks, bulges, and chaffed areas
  • Make sure the throttle moves freely. Closes easily. Lube if needed.

L- Lights & Electrics

  • Check that the battery terminals are clean and tight and that the electrolyte level is correct. Plus make sure the vent tube is hooked to the vent outlet and not kinked
  • Check the turn signals and brake lights for proper operation. Make sure the lenses are not cracked or broken
  • Headlight- Check for proper operation and alignment

O- Oil Levels

Check engine oil level plus transmission and primary drive fluid levels

C- Chassis

  • Steering Head-Move handlebars back and forth to check for tight spots or binding.
  • Hold the front brake and rock the bike front to back to check for any free play in the neck bearings.
  • Suspension- Check the front forks and the rear shocks for smooth travel and right air pressure (If equipped)
  • Belt- Check tension and visually inspect for any rocks or other objects stuck in it.
  • Fasteners- Check for any loose nuts or bolts and tighten if needed

S- Stand

Side stand- Check for ease of operation and spring action.
A pre-ride inspection should not take more than a few minutes. If it is done before every ride, it can help you identify potential issues before they become a larger problem or safety hazard.
To help you get ready to ride download and complete the MSF’s T-CLOCS inspection checklist by clicking here.

Thursday, August 1, 2019

Top 6 Facts You Should Know About Your New Motorcycle

Often experienced motorcycle riders who trade in an old bike for a brand new set of wheels find that they fall prey to an unfortunate set of statistics that occur along with new machines–more motorcycle accidents happen on new equipment than on old faithful rides. Don’t assume that 100,000 miles on your old bike means equally capable handling of your new set of wheels. Instead, take the time to learn some facts about your new motorcycle.

Low-Speed Handling

If possible, find a deserted level parking lot that has a relatively clean surface. You don’t need bumps, slippery stuff, inclines, potholes or other defects or obstacles in order to learn more about your new motorcycle. You need to plan on spending time having fun and getting to know the quirks of the new wheels. Start by doing low-speed circles with your eyes on the horizon and practice until you can do a 360 without putting your foot down and with the steering in full lock. This may require some adjustment in the position of the handlebar or the throttle cable in order to smooth the acceleration action. Follow tight circles with tight figure eights, again without touching your feet to the ground until the bike has come to a full stop. Force yourself to be consistent and precise. This will provide even more understanding of the throttle response in your new motorcycle.

Acceleration

Repeat the previous exercise at higher speeds–both the circles and the figure eights. Keep your eyes on the horizon and your feet off the ground so you learn the feel of the equipment as it corners correctly and consistently. Varying the speed of the engine while you practice these maneuvers will allow you to ride comfortably at highway speeds as well as in city traffic.

Cornering

Follow this with learning about the bike’s cornering limits. Learn to accept the grinding noise without flinching when a floorboard scrapes the pavement. A reflex jerk to avoid the sound of metal on pavement can cause you to steer right off the curve. If you feel more cornering ability is needed, you may need to change the suspension components.

Calling a halt

Practice stopping at low speed with a hard stop in order to learn the traction on the new tires, the sensitivity of the brakes and how the bike handles with the rear wheel locked. You need to know precisely what to expect in a real life panic situation and the best way to do that is to practice a hard, locked wheel stop especially in a sideways skid. Once you’ve practiced the rear action, learn about the power of the front brake. Be careful not to overdue front brake activity until you have a clear understanding of how much pressure the crucial front brake will take. Again, you may need to do some adjustments to the brake controls engagement points or positions to better suit your riding and stopping style.

Road Work

Now is the time to move your practice skills to the open road. Try to pick a relatively lightly traveled section or road that has some open corners so that you can practice cornering at highway speeds. Continuing to practice leaning techniques will help you to know the limits of the bike in every situation. Use a straight road with painted dotted lines and practice swerving the bike between the gaps on the road. If you can find safe stretches with raised dots for lane markers, you will be able to feel immediately if you miss the swerve. Once again, in a safe mode, practice your hard stops at highway speeds. Be aware of the following traffic before hitting the brakes suddenly and be sure to allow plenty of room in case you overrun your target point.

Double Up

Each of the exercises above should be repeated while carrying a passenger. Even if you do not carry anyone else regularly, knowing how your bike responds with a passenger is critical in any emergency situation–even in everyday riding. Your motorcycle will respond differently, and you should know what will happen before getting on the open road. It’s important that your passenger understands what is going to happen so that they don’t panic and throw the motorcycle off balance, thereby causing a serious accident.
Another advantage of going through these exercises in low or moderate speed and varying the load on the engine is that they serve as a good break-in regimen for the engine.
Now that you have your new motorcycle and have practiced the various maneuvers above, you will want to remember that in adverse weather or road conditions, the new motorcycle may not handle the same as did your old set of wheels. Take things really easy the first few times you ride in the rain or in icy situations. If you have the opportunity to practice in different weather experiences, you will have an even better feel for your motorcycle’s handling capabilities.

Friday, June 21, 2019

How to Sew a Patch on Leather


Do you a pile of patches that need sewn on but you’re not sure how? Maybe you’re tired of paying
someone else to sew them on for you. Especially, when you get it back and many of them are crooked
or have messy stitch lines. 

This post and video will walk you through how to sew on your own patches even if you are not a
confident sewer. You don’t need a fancy machine or a ton of supplies. 


Supplies

  • Ruler
  • A sewing machine. A good option for sewing on patches if you don’t plan to do a lot of other
sewing is the Singer Heavy Duty. https://amzn.to/2WInkIX
  • Thread 

Setting up the Machine

Thread your sewing machine and wind a bobbin with thread that matches the outer edge of the patch.
Refer to your owners manual for threading your machine or if you don’t have it this video shows you
how. https://www.youtube.com/watch?v=ghJMlLBngYM&t=3s 

Stitch Length- The stitch length on the machine will need to be increased to at least 3.0. If the leather

is very thick or you will be sewing over a seam/several layers increase the length to 3.5-4.5. 


Preparing the surface

Before placing the patch on the leather the leather needs to be cleaned. Always use a cleaner that is
designed for leather. If you don’t have anything for leather you can take a slightly damp cloth and
wipe the area. Do not get it overly wet.

Placing the Patch

Before you sew the patch on you need to decide where you want to place it and make sure it will fit.
Use a ruler, if necessary, to make sure the area around the patch is even. 

If the patch has text stand back and make sure the text is lined up. Once you have the patch in a l
ocation you like spray the back of the pacth lightly with an adhesive spray made for fabrics.
Press the patch down and wait about a minute. The patch should now be temporarily held in place. 

Sewing the Patch Down

Make sure you machine has a needle designed for leather and the stitch length has been increased as
described above. Raise the presser foot up and place the garment under the foot. Line the outer edge
of the patch up with where the needle will go down. You can check this by slowly turning the
handwheel of the sewing machine towards you. 

If you machine has the option for the needle to be down when you stop sewing, engae or turn it on.
Slowly take a couple of stitches and then backstitch. Maneuver the garment around so that as you
sew you are staying lined up with the edge of the patch. Take your time and reposition as needed.
When you get back to where you started take another couple of stitches and then back stitch to lock
the stitches in place. 

Finishing up

Clip any thread tails that may remain. If you use your sewing machine for other projects make sure
you remove the leather needle and return the stitch length to the regular setting. 

Now that you have learned how to sew on a patch onto a leather article of clothing, you will be
amazed how easy and fun it is to do it. The key to success is using the correct tools and taking your
time to.

Thursday, June 13, 2019

The Story Of The Sturgis Motorcycle Rally In South Dakota

Every year modern-day cowboys are seen frolicking around South Dakota. They prepare to
race and to show their unique physical feat riding their iron horses. There are thousands
of them and all are motorcycle enthusiasts. Bikers from different places travel to the
 so-called Mecca of hardcore motorcycle fanatics to witness the event called The Sturgis Motorcycle Rally, which is held in Sturgis, South Dakota.
This event happens only during the whole first week of August every year. This is where
bikers break away from all the hustle and bustle of their daily stressful lives.

At the Sturgis Motorcycle Rally, radical motorcyclists create their own nirvana.


The goal of the Sturgis Motorcycle Rally is to gather people as well as motorcycles.
Bikers coming from all walks of life, converge to participate in this grand event.
You may be surprised to know that there are doctors, teachers, engineers,
and other blue-collared professionals included in the crowd. These individuals are those
who consider motorcycling a lifestyle rather than a simple means of getting from one place
to another or from point A to point B.

It all started when Clarence Hoel, also known as Pappy, bought his Indian Motorcycle
Franchise in the same city where the rally is held every year. Soon afterward, the
Jackpine Gypsies Motorcycle Club was born. This club owns the field areas, tracks
and hill climb where the rally takes place. Only a year after, the American Motorcycle
Association (AMA) recognized the club. It was in August 14, 1938 when the first Sturgis
Motorcycle Rally began. Back then, it was popularly known as the Black Hills Classic.
There were only 19 participants and a few members in the audience.
The rally included a half-mile track and unbelievable stunts. The stunt performances
included intentional board-wall crashes, motorcycle jumping on-ramps as well as a
head-on collision with another motorcycle or a different automobile. Johnny Spiegelhoff
from Milwaukee won the majority of the prize money given by four local businessmen.
Five hundred dollars was a huge amount of money during those times.
The first Sturgis Motorcycle Rally lasted only for two days.

Since then, the rally has been held annually. However, the rally was canceled during
World War II. This is to support gas rationings for war tanks. Moreover, young men
were also brought overseas to be part of the country's armed forces.

When the war was declared over, the Sturgis Motorcycle Rally came back to life, gaining
tremendous popularity. For the first time in history, the main street of Sturgis was blocked
just to have a ceremony that lasted for two hours. During the early years of the 1960s,
the club of the Jackpine Gypsies introduced the Hillclimb and Motocross races.
One block of the Sturgis main street was closed to be used for motorcycle parking purposes.
The rally became a three-day course. However, by 1965, the Sturgis Motorcycle Rally
became a five-day event. About one thousand motorcyclists from all over the U.S.
attended the rally.

At the same, the event included a feeding program led by the Sturgis Chamber of
Commerce held in the city park. Awards were given to the longest-married couple,
oldest rider, best-dressed male and female, and the cyclist who traveled the most distance
just to reach Sturgis in South Dakota.

In 1989, a sad day befell everybody as they mourned over the death of Pappy Hoel,
the founder of the rally. The whole week of the Sturgis Motorcycle Rally was dedicated
to the father of the said motorcycle event. He earned a national citation for his dedication
in making the said motorcycle event into one of the biggest occasions in the world of
motorcycling.


In 2000, there were more than 600,000 participants who attended the years rally.
This is the highest figure they have so far. The Sturgis Motorcycle Rally had also recently
celebrated their 67th anniversary, attracting more and more people, both bikers and
non-bikers.

Sunday, March 24, 2019

Millers Smokehouse in Belton, TX- Spring 2019

Spring officially began on March 20, 2019. And with that the weather took a
remarkable turn for a beautiful day of riding. With work at my new employer and
Margaret deep into her spring semester at school we haven’t been very active with
motorcycle activities for quite awhile. Today however we saw the weather was
going to be amazing and quickly planned a day of riding!
For over a year we have been wanting to take a ride to Belton, TX and try
out Millers Smokehouse. It was rated in the top 50 BBQ places in state of
Texas for BBQ by Texas Monthy in 2017. I contacted our closest friends
Steve and Angie to ask if they wanted to go with us. I was glad when they said yes
and also brought another couple we ride with as well. Millers opens at 11 AM to 3 PM
on Sunday or until the meat runs out. Since it was late notice we took the interstate to get
there right at opening time to beat the crowds. It’s just over a 2 hour ride and we arrived
about 11:30 AM.


It was just getting busy and we were able to walk right up to the counter and
place our order. This didn’t last for long though. Within an hour after our arrival
there was a line out the door and probably 20+ deep in line outside the building
along the sidewalk. That line never dwindled down the entire time we were there
and even got longer as the morning rolled on. Millers Smokehouse didn’t disappoint
either, proving without question why they are rated as a top smokehouse in Texas.
I wanted to try all kinds of stuff so we intentionally ordered too much with plans of
taking what we didn’t eat home. We got moist brisket, lean brisket, regular flavored
sausage, a rack of ribs, potato salad, and mac & cheese. Every item was exceptional
and can easily be placed among the top BBQ items we have ever eaten.
They also make their own fountain drinks all of which were good as well.
While we were eating a surprise visitor arrived that we were excited to see!
Chip from Fixer Upper came in!
They have a TV show where they renovate homes in the Waco area for clients that is a
great show to watch. Margaret and I are regular viewers and have also visited their
store Magnolia Market in Waco as well. I couldn’t help myself, not that I’m a fanboy
or anything like that but I do like the show and it’s not often you get to meet a celebrity,
so I asked him if he would let Margaret take a picture of us together.
He was so nice about it and gladly accepted. It’s really kewl when a celebrity is
genuinely kind and will do something like that even when they are out just doing
things like trying to eat. Thank You Chip! I greatly appreciated your time for a picture!
Now it was time to head home. The plan today was to head straight to Millers Smokehouse for lunch, then take a nice long scenic route home. The temperature rose to 86 degrees with clear skies and the wind was at our backs! It seriously couldn’t have been better. We rode 298 miles and had more fantastic experiences while we were out again. It always amazes me how you can ride out into the unexpected and find experiences and treasures you never even planned for.

Ride Strong Wrench Proud