Sunday, August 9, 2015

Fill Your Tank at Red Hot & Blue

Margaret from This Lady Rides and I have teamed up to begin a new series called Fill Your Tank of our favorite eateries that we like to take rides to. We will be writing independently on our blogs about the experience and making videos to accompany the posts. For some of the day long or over night stays we will begin offering ride maps to get you off the interstates and onto scenic back roads for an exciting ride along the way. Some of these are going to include places of interest that will make for some great stops not only to rest for a bit but to spend some time seeing local sights of interest along the ride.


This first restaurant of our series was Red Hot & Blue. We have been eating at the location on the corner of Bellaire Dr. South and Hulen in Fort Worth, TX for over 15 years and never had a bad experience. We always sit in the bar area and the service has always been superb. I almost always order the dry rub ribs. Red Hot & Blue is the only place we have found so far that offers true Memphis style dry rub ribs in our local area. We have been to Memphis and experienced incredible dry rub ribs and Red Hot & Blue comes close to what you would expect from that particular style of smoking.


We chose Red Hot & Blue this time because in our area its over 100 degrees everyday and taking an extended bike ride, especially in the afternoon, is extremely hot. The restaurant is only about 8 miles from where we live and allows us to take nice shady neighborhood roads to get to the location. It makes for a good ride to get out on the bikes without physically draining us by the time we get home.

Neither of us are big meat eaters and both of us mostly eat more on the vegetarian and closer to vegan side of food. About once a week though we will have a meal with meat and when we do we want it to be good. I have written on Healthy Living for Healthy Riding in the past and we stay quite true to what was written in that post. Well usually make the one or two meals a week which include meat part of one of our bike rides. That makes it somewhat special for us and we decided it would be nice to start the series Fill Your Tank to share those destinations for others to experience if their around the area or passing through.


Sunday, August 2, 2015

New Mexico, Utah, Colorado: Part II

Moab, Utah was a great experience on this trip.There are many roads around the area that make for a great ride and the scenery is phenomenal. We stayed here for 2 full days after arriving so we could visit Arches National Park and Dead Horse Point State Park which is known to have some of the most stunning sunset vistas  in America.

We paid for a guided tour by a Park Ranger in Arches National Park called the Fiery Furnace. The hike is considered one of the most extreme guided tours the park offers and along with that came some great scenery, history, and science. We also made sure to ride out to Dead Horse Point to capture a sunset.


We spent some time in Moab on Main Street during the heat of the afternoon visiting local shops, eating at the local restaurants, and seeing the museum. This gave us some down time to relax while the heat was at its highest to keep us cool yet active.

We left Moab, Utah to begin our journey home. This would take us through Grand Junction, Co and to the Grand Mesa Scenic Byway which would take us to an elevation of over 11k feet above sea level. As we neared the highest elevations snow covered the ground and the temperature plunged. It was quite a day of riding to think we left Moab with the temperature at over 100 to ride into the mountains and have snow. We stopped in Cedar Edge, Co where we had reservations at a lodge for the night. This would be the last day of our trip where we were taking our time on back roads and spending extended time at various sites along the way.


There were still great roads along the way home though. US-92 and US-50 took us through some fantastic mountain scenery, lakes, and winding roads. CO-114 followed a river through a valley with tall walls on both sides and then out to some incredible high plains views and cool air at higher elevations. We also stopped at the Great Continental Divide at over 10K foot above sea level on CO-114 to take pictures since we don't have a Continental Divide where we live. During this part of the ride Margaret was suffering from a touch of food poisoning from a place we ate at in Cedar Edge. We would pull over at every road side stopping area so she could empty out. At one quiet place in the river valley while she was in the restroom I was wandering around looking at the scenery and saw a small paper bag on the ground. I figured I would be a good Samaritan and pick it up to throw it away to keep the place clean. To my amazement the bag was filled with rolling papers and a green medicine bottle that contained half an ounce of prescription marijauna! Funny to think we were in Colorado where its legal and just happen to find that. I'm sure whoever lost it wasn't happy about it though. I emptied the herb into some bushes and threw the rest of the stuff away. I didn't want it to possibly fall into the hands of children who may stop at that rest area later on.

It took 2 full days to get home from Cedar Edge Colorado. The first day was very cool for the entire day. The mountainous roads were cool and there was a good chance of rain for most of the day which kept it overcast. We only got rained on once for about half an hour so it turned out to be a nice day of riding. The second day however was grueling. As we came back into Texas the heat climbed back up and by the time we got home we were exhausted.

This was the first trip on my new FLHXS and the bike did well. There were a few issues though which can be expected since it only had 1100 miles on it when we left. Again I took tools as always and was able to repair everything along the way. This video: Tools for the Road will help if your interested in keeping a decent set of tools while saving space. The trip button stopped working during our stay in Cortez, NM and I think it was due to dust getting into the control housing from the dirt road we had to ride on every day to get to the places we wanted to visit. I pulled the housing apart one evening and cleaned it out well, pulled the ECM and battery leads to reset it and it began working again. The infotainment center blacked out completely one time. I didn't do anything to fix that. We stopped to eat, came out, it came back up and has been working ever since. The forward shift linkage came loose and was almost spinning on the shift shaft. I found that in Moab when we were washing clothes and our bikes. I hit it with the pressure sprayer and it flopped around. At the same time I found my rear brake pedal was also loose on the shaft so I was able to tighten both up. The last problem I had was the rubber mount for the exhaust under the saddlebag slid out and the exhaust began rattling in the bracket. The rubber fitting had been put in backwards from the factory so I repaired that along the way and haven't had any problems with it since then. Not too bad for a new bike on its first trip with such low mileage and hardly any real break in or road time.


It was a great ride and it was sad for it come to a close. I want to give a huge Thank You to  J-Man on YouTube who's video on Utah Rt 128 Scenic Byway (which we rode) inspired us to make this trip.


Thursday, July 9, 2015

New Mexico, Utah, & Colorado: Part I

For the past 8 months we prepared for a 2 week ride to New Mexico, Utah, and Colorado. We booked and paid for rooms in advance as we prepared our route. Any extra income was saved and taken in cash that we used for meals. By the time we left the entire trip was paid for with the exception of fuel. That makes for a worry free get a way to not have to worry about paying off credit cards or being in dept after the vacation is over with.

The first day was a hard ride from Fort Worth, TX to Artesia, NM where we would spend 2 full days visiting specific places we had wanted to see. Along the way a bee hit me in the face and left its stinger in my forehead. I finally had to pull over because it burned so bad and when I pulled my helmet off the bee fell out. It had hit me, stung me, then somehow crawled up inside of my helmet. All we had that could relieve the burning was some cortizone which we applied and moved on.

This part of the ride wasn't very scenic in the concept of beauty. Once we crossed into New Mexico and headed into the desert areas the landscape was saturated with oil rigs and natural gas drilling. Rigs dotted the horizon as far as the eye could see which in itself was quite incredible. The smell of gas and petroleum was overwhelming at times and I tried not to inhale too deep to keep it out of my lungs as much as possible. Seeing and smelling this remarkable industry made me more aware of the enormity of the petroleum and gas industry as well as our reliance on it.


We arrived in Artesia, NM and used that town as our base for the next 2 days of sightseeing. Roswell, NM was our first stop where we spent the day riding and visiting the alien museum and other alien related attractions that we discovered. The following day was spent in Carlsbad Caverns. This made for a wonderful cool day inside the cave and kept us out of the heat. We took our time through the cavern and Margaret had the great idea to hike back out instead of using the elevator. The mile plus hike out was steep and exhausting. It took us 45 minutes to make the climb and when we got back to the visitor center we were so hot we decided to take the elevator back down into the cavern where it was cool to rest. We stayed down there for a couple hours and gazed in wonder at the formations while we cooled down. As dusk neared we took the elevator back up so and headed for the entrance of the cave for the bat swarm viewing. Those things come swarming out of that cave by the thousands and its quite a site to see. A thunderstorm was moving towards us with brilliant flashes of lightning and the roar of thunder and the thought of riding back at night in the rain was not looking positive. We put our rain gear on in preparation for the storm and incredibly made it back shortly before the storm hit.


The next couple days we spent riding scenic routes and back roads to get to our next destination at Cortez, CO where we would stay for another few days to see the sights in the area. As we exited to the final road where the lodge was located the road turned into gravel. We had to ride 10 miles on that gravel to get to our lodge due to construction that had begun the previous month. It was awful and since we were staying there for 3 nights it meant a 20 mile ride on gravel every time we left the lodge. We decided to 2 up since Margaret wasn't comfortable riding in that type of surface. It also saved us a lot in fuel to leave her bike at the lodge. During this part of the trip I think dust got into my trip switch because it stopped working. I pulled apart the control housing one evening and cleaned it out but still couldn't get it to work. I also reset the ECM and electronics by removing the battery leads but that didn't work either. Since the only effect the trip meter had was  not being able to flip between odometer readings I wasn't worried enough to try and get it repaired.

While in Cortez, CO we spent 2 days seeing the various Indian cliff dwelling ruins at Mesa Verde National Park and went to Hovenweep Castle to see the ruins there as well. Neither of us had ever seen any of this history and it was something we both had always wanted to visit. It was absolutely remarkable to think of how the native Americans constructed these dwellings and the environment they lived in with so little water and extreme weather conditions. There was a lot of hiking involved during these 2 days and it made for a nice change from riding.


During our trip we were fortunate to see the desert in bloom. The locals told us they had finally come out of a 10 year drought which was causing the desert areas to bloom with an incredible variety of foliage and flowers. We took pictures of some of the flowers and plants since rainfall doesn't happen with much frequency to cause the blooming. This made for an unexpected yet pleasant surprise and addition to the ride.

After Cortez we headed into Utah to ride UT-95. It is a Scenic Byway with incredible views for over a hundred miles. This also took us past Natural Bridge National Monument so we made the stop to see the first sandstone arches of our trip. This was also our hottest day we had experienced during the ride so far. Because it had been raining and somewhat overcast, up to this point the riding was somewhat comfortable. And we had only gotten caught in the rain once and even then only for a few miles along the road. Now however we were in full sun, desert region, no rain, hardly any clouds, and no towns for miles. It was beautifully remote and scalding hot at 110 degrees. We rode 10 hours in this from Cortez to UT-95 into Hanksville, then onto UT-24 and finally pulled into our hotel in Moab, UT. It was quite an experience though and were both glad to have done it. The weaving canyon roads carved out by small streams and breaking out into endless miles of barren desert were fabulous. To ride for hours and never reach the horizon you see in front of you is an experience I will never forget. 


This marked a couple days past the halfway point of the trip. I'll break this trip into a couple parts and continue the journey on the next post. If your interested in the route we took here are the trip directions in a PDF format: New Mexico, Utah, Colorado. Hope you enjoy!


Thursday, June 11, 2015

Getting the New Bike Setup

It didn't take long to know I was going to need new handlebars on the bike. We took a couple rides and the stock bars were so low that I had to reach downwards to get a grip on them. Soon after my shoulders and back began to hurt from the awkward reach. Something had to be done.
I went with the Paul Yaffe monkeybars again because the pullback and width fit me well when they were on my 2012 Street Glide. This time I put the 10" bars on instead of the 12" though. Doing this kept the hand grips behind the fairing which keeps my hands from being exposed to rocks and wind. This will help in winter riding for the cold too. They are still high enough to allow enough pull back to keep from having to reach downwards like the stock bars. And they still look nice too.

The process of installation was much easier on the 2015. Harley made marked design improvements that affected many areas of the new bikes. Fortunately some of those improvements also affected modifications to the bikes making the task easier. Installing the handlebars is an example. They put longer brake lines and hydraulic clutch lines from the master cylinder so you don't have to replace those as long as your only putting 12" or lower bars on the bike. They also made a wiring junction on a plate that is mounted under the radio. The wires in this junction are able to be removed from the zip ties that hold them and re-routed back towards the handlebars which allows you to put up to 12" bars on the bike without having to cut and solder extensions. Even the removal of the inner fairing was made easier with the new style of fork mount that allows you to simply lift upwards then back after removing the turn signals, turn signal bolts, and accessory console. That also makes adjusting them later much easier and quicker without hardly any tear down.

I did a video on the process and as mentioned for the 2012 model you need to have some mechanical and electrical aptitude to successfully accomplish the install. Even though its easier to install bars on the 2014 and 2015 models, its still not going to be for everyone. Safety is the first goal when doing something like this and not performing even one task correctly could put your life at risk on the road. If there is any hesitation about doing the installation yourself, then you probably should let your dealership do it for you.

Stock Handle Bars


Paul Yaffe 10" Monkey Apes


How to Install 10" Paul Yaffe Monkey Bars on a 2015 Harley Davidson Street Glide Special


Sunday, May 24, 2015

Time to Move Along

Since beginning this blog I have written articles from a wide variety of subjects always trying to keep each write up riding related in some manner. Margaret even became part of the posts upon learning to ride and now is well part of this blog. From the beginning I started the blog to share in riding activities experienced on my Street Glide. During the blogs lifetime I went from 25 miles on the odometer to 62,908 on my bike. It has been the iron horse that carried me through every post. The same bike is what encouraged the maintenance page and was the star that began and played in my UTube channel on How to Maintain a 2012 Harley Street Glide.

That 2012 Street Glide has been a fantastic and reliable bike. It has had its share of breakages but never left me stranded. Due to my past work commute I would put 600 miles each week on it and then add whatever riding activity on the weekend to that mileage. It has seen its share of weather conditions, back roads, dirt roads, highways, and states across America. It had evolved from the stock Street Glide off the showroom floor to what it is today.


Now that I am working only 9 miles from home and left that hard commute behind the miles began slowing down. I had to consider the fact that at nearly 63k miles the depreciation was already beginning to hit the bike hard. At 75k you cannot extend the warranty any further on a Harley and I will hit that mark in a short amount of time, especially after our vacation ride this summer. Even though the bike rides as solid as it did when it was first purchased I decided to begin looking at trading it in to begin anew.

At first the numbers just didn't come together on a new bike. The mileage was the problem. I eventually just gave up and decided to dig in with my bike for the long haul. About 2 weeks later I got a call from our salesman Race saying the dealership owner wanted to make the trade happen. At first I was skeptical, after all, they weren't able to do it over the last two weeks, why now?. Within minutes Race called back, asked me to come up to his office so we could talk. Since I work at the dealership I headed that way to see what they had in mind. I never would have expected the extent of the offer.

I sat down, Race looked at me and said, "Not only are we paying your bike off, were giving you more than you owe". What?! I never would have expected that! Not with the mileage on the bike. Then he asked me how I wanted to use the money from my extended warranty. I had purchased 4 years additional at the time the factory warranty ran out. That extended service plan can be rolled into a new bike or the remaining balance can be applied as a down payment. So I applied it as a down payment. They also made an excellent offer on 5 years extended warranty which was far less than I paid for the 4 years I had on my previous bike so I added that as well. And to top it off I upgraded to a Street Glide Special as well!

I had to comment on this whole ordeal because it was the fairest offer I have ever received in the motorcycle or automotive industry. Fort Worth Harley Davidson went far beyond what anyone could have imagined and treated me very well. They genuinely want to get you on the bike your wanting and will go to great lengths to make that happen. If your shopping for a new bike I would encourage you to give them the opportunity and see what they can do for you.

I was able to swap some of the parts from my 2012 to the 2015 Street Glide which was nice. I didn't have time to remove the handlebars though so I ordered new ones and when I get some time we'll put a video up of how to install those on a 2015 since there are some differences. For now though, its time to ride!

My new 2015 Street Glide Special (FLHXS)


Wednesday, May 13, 2015

How to Install a Front Fender on a 2012 Harley Street Glide

This post finalizes the procedure of removing and installing a front fender on a 2012 Harley Davidson Street Glide. As mentioned in the post on how to remove the fender, mine suffered damage at an event from somebody that didn't have the decency to even leave a note apologizing for their carelessness. As in all aspects of life there are people who simply look out for themselves even if they are the cause of problems for others. Those people don't have the honesty or integrity to admit to those they affect as being the cause of the swath of destruction they leave in their wake. Oblivious to the world and people around them, they take for themselves, look out for themselves, and will not take responsibility if the outcome will affect them in a negative manner. This was the type of person that caused damage to my bike.

Fortune however smiled upon my situation as being the innocent victim in this case. A very talented and honorable man saw my plight and offered his assistance. He repaired my fender and had it back to me completed within 4 days! The work was stunning showing his perfection of his trade. You could look into the beautiful gloss black seemingly forever. The reflection was deep and the paint was smooth and without flaw. Juan is a true professional in his trade and I am grateful to know him and entrust paint work to him.

Thank you Juan for taking care of my fender situation and showing there are people with integrity and honor that believe in helping others. I would recommend him to anyone that needs paint and body work done on their bike.


How to Install the Front Fender on a 2012 Harley Davidson Street Glide


Saturday, April 25, 2015

Life is Everchanging

Life is so unpredictable and seems to take extreme turns without notice. I am often in awe of how life seems to move you into different directions even without self input. Recently, one of those changes occurred to me that I am very excited about.

For almost 5 years I have worked at PepsiCo as a contract technician. The job came about accidentally like so many life changes often do. The commute has always been awful having to travel 120 miles a day round trip. Then add toll fees, gas, maintenance, repairs, traffic, road rage, accidents, heat, rain, snow, etc. and it doesn't take long to see it's not a good situation just to get there and back every day. At first the job was fine, but soon after and up until I resigned, I found I was so often completely taken advantage of as are most contractors to PepsiCo. The employees have an elevated sense of entitlement and privilege because they are employed by PepsiCo and carry that attitude with them with raised chins and extended necks as they look down upon contractors as sub-workers. My department in particular only had two employees and one contractor, me. It soon became evident that I was to be worked dry while the two employees enjoyed their privileged status by disappearing unaccounted for throughout the day for hours at a time, leaving for lunch and not returning, making their own hours which conveniently seemed to fall outside of the busiest times of the day, while leaving and expecting me, the contractor, to keep up with all of the work while they enjoyed their days at home and play as they drew a paycheck.


Mondays and Fridays were without fail, the two days one of them if not both, would call in with a sudden illness that was so bad they wouldn't be able to make it in for the day. I was always amazed how someone could acquire a new illness every Monday and Friday. The manager would call in sick weekly on one if not both of those days, and then claim to be "Working from home" on another which meant he would answer an email to justify his time sitting at home and getting paid. On the few days he would allow an interruption of his life at home by showing up at work, he would arrive at 9:30am leave at 11:30am for a 2-3 hour lunch, and if he even returned, he would close out his day at 4:00pm. PepsiCo employees rely heavily on the reliability and consistency of  its hard working contractors to keep their company running because, after all, they are too entitled to full fill the work necessary and are often times simply incapable of performing their jobs at all. And through this I was ordered by the manager to make sure our department had a polished look to the company. This was simply a cover up for the indiscretions of the two baffoons I worked with so their inappropriate habits wouldn't be found out. Even after I had left the company justified its typical unprofessional behavior as I had to endure harassing calls to my personal phone from the manager.

At the beginning of 2015 I had enough of the abuse of performing not only my work responsibilities but of the other two people I worked with while they enjoyed paid life outside of work. I made some calls, sent out my resume, did some phone interviews but just didn't have that feel good sense about any of them. I figured this go around, since I was employed, I would take my time searching for something that I wanted to do, not take a job just to keep a check flowing.

Fort Worth Harley Davidson will be expanding and opening a new dealership in Burleson, TX sometime mid summer. I began considering whether working for them would be a possibility. I worked on my resume to have it ready in case something opened up. Then on a Monday in early March, Margaret called me and said they had posted about an opening in Service. I was ready! I sent my resume off immediately to the service manager. That same Monday evening I was taking my bike to the dealership to have a wheel bearing replaced. I walked in, saw the service manager, and introduced myself. I was surprised when he pulled me into his office and gave me a spontaneous 1.5 hour interview. This was one of those times where you know it was meant to be. We meshed perfectly and got along like we had known each other for years. At no time was there any awkwardness. He said he liked my skill sets and personality and believed I would be a good fit at the dealership. He said he had a good "Gut feeling" that I would be perfect for the job.

Obviously I accepted the offer and am excited to be the newest Service Writer for Fort Worth Harley Davidson. The timing and just how the position came about without effort made it clear that I needed to move into a completely new career direction. And to have that career within something that I have a passion for, Harley Davidson, provided further confirmation that life was moving me in another path.

I'll be in training for almost 3 months to learn all of the processes and details of the position. It's a bit of a change from what I've been doing for 5 years but there are similarities in managing processes and organizational necessities that fall directly into the Service Writer position. Next time your around Fort Worth Harley stop in to service and say hello and if you need work done on your bike ask for me and I'll be there for you.


Sunday, April 12, 2015

How to Remove the Front Fender on a 2012 Harley Street Glide

Sometime during the previous 2 weeks my fender was damaged on the Street Glide. We have gone to Granbury to eat dinner once and to a bike event which was very busy. I don't know when it occurred but I noticed the damage when I was putting new polyurethane handlebar riser bushings on Margaret's bike when a socket rolled against my front tire.


It's frustrating but bound to happen, especially when you ride a lot. The problem with the damage on my front fender is that a new fender is about $500 painted and depending on your insurance deductible it might not even make sense to file a claim on it.


We decided to make a video of how to remove the fender. This could be useful down the road for someone who needs to remove theirs due to damage or if your doing a fork removal and rebuilt you will have to remove the fender for that as well.

How to Remove the Front Fender on a 2012 Harley Street Glide


Sunday, April 5, 2015

Paul Jaffe 14" Monkey Bars

Last weekend was quite intense and not without some issues which I will address in this post. Installing apes can have varying degrees of difficulty dependent upon the bike and which handlebars you choose. The Street Glide is one of the more difficult because of the fairing and electronics involved. The job was a success though and worthy of writing about.

The initial breakdown of the bike was very easy and quick. seat, battery, outer fairing, radio,grips, control housings, ignition, passing lamps, and loosening of the outer fairing. Finally upon removal of the stock handlebars the real challenge began. I was pretty excited the work was going so well up to that point and was feeling positive. Even with  taking time to make a video of the process I was making good time. Soon after though I hit the wall of troubles.


I made a wiring diagram of the wiring harnesses in preparation to extend the control wires for the new handlebars. During this I took the time to make a sub video of how to wire Harley Davidson molex connectors. With Margaret's help I soldered the extensions to the factory wire harness and wrapped each solder weld with shrink tubing before trying to pull them through the new handlebars. Before pulling them through the handle bars we then covered all of the wires with large shrink tubing that we joined to the original wiring harness cover to make a clean seal over the wires. The left side went through without any problems and only took about 5 minutes. The right side is where the problems began.


The right side has more control wires and has the throttle by wire assembly as well. The control wires enter into the handlebars through a hole on the front of the bars, the throttle by wire enters through the end. On any other type of handlebar this wouldn't be much of a problem. With the Paul Yaffe bars that little upcurve to a point is what changed the game. The wires had to make that upturn and then pull straight down against that inner point to route through the bars. We worked on that for a couple hours, trying everything we could think of to get all that wire through and it simply wouldn't go. The wires would continually get caught in that tight turn and wouldnt pull through. We managed one time to get all of the wires completely through the handlebars to the point there was only about 4 inches left to pull out but we were unable to get the wires around that sharp curve to completion. We tried grease to help it slide through and even that didn't work. It was frustrating to get so close and have to pull them all back out because they wouldn't go through.


By this time it was getting late, I was tired, so we stopped for the night to unwind and think about other options. I hesitate to mention it was so frustrating I considered not running the wires inside the bars but that would have looked awful. After a nights rest we resumed the battle of the wires. The problem was the extra bulk that the left side didn't have. We realized somehow we would have to reduce the amount of bulk we were trying to pull through the handle bars. The only way would be to remove all of the original outer wire harness covering and the shrink tube to get down to only wires. I left harness covering on the last 6" of all the wires so that when the wires were in the handle bars they would be covered around that upturn that was giving us so much trouble. That way they would be protected from scratching in that sharp turn by the covering. We worked the wires until they laid well against each other without crisscrossing which helped to eliminate bulk and put a single wrap of electrical tape along the length periodically to hold them together. Doing this eliminated the bulk by half and still protected the wires at the critical location of that point towards the top. I had remembered some episodes of American Chopper  where they were pulling wires through the frames and they weren't covered with a harness except at the entrance and exit points where there might be sharp edges due to the cutting of the hole. There isn't anything inside the bars happening that could cause the wires to be damaged except at the entrance, the upturn point, and the exit which we put harness on in those areas to protect the wires. Within a few minutes doing it this way we had the right side installed. I put harness over the wires at the exit point for protection and began rewiring the molex connectors. I made a short video on the process of wiring a molex connector for a Harley that you can view from this link. Ill write a post about just this process later because there are some details that can be helpful


The reassembly took place without any issue until we got to the new brake lines. The junction of the stock lines has a cutout that fits into a small pin that sticks out of the triple tree. This prevents incorrect installation of the junction by insuring it can only be fit one way. The new junction didn't have that cutout and wouldn't fit. After attempting every way of turning and manipulating the new junction without success I just ground the pin off the triple tree and installed the new junction since it serves no other purpose. We bled the brakes and moved to the clutch cable. Keep in mind if you have ABS you cannot perform this job at home. The brakes have to be bled by a dealership using a Digital Technician to purge the air out of the ABS solenoids that may be trapped.


Next came the clutch cable. That meant removing the floor board, slip ons, exhaust, and transmission clutch cover. This part went perfectly without problems from start to finish. Then it was just a matter of reassembling the fairing components, battery, seat, ignition, etc. Upon completion the bike started right up, all of the electronics worked and I was able to take it for a quick test ride. Over the next few days I had to make adjustments to the position of the handle bars for comfort which entails a modest tear down to get the T-40 Torx on the handle bar mount. With making a video, taking pictures, and performing the work I estimate we spent a solid 16 hours on this install. The bulk of wasted time being on the right side control wiring.

This is not a task I would recommend for most people. If you have any hesitation at all, let the dealership do the work. The mechanics know the job and have prior experience and tools to do it correctly. It takes a good amount of mechanical and electrical skills and requires some specialized tools. For instance, the snap ring inside the transmission clutch cover is huge and I didn't have a set of snap ring pliers that would work on it. I went to Autozone to purchase a pair, got the largest ones they had, and they were even too small. We ended up finding a set at Harbor Freight but those were so big I ended up having the file down the points to fit in the snap ring holes on the bike. I probably could have ordered them but didn't want the bike sitting in pieces taking up garage space while we waited for them to arrive. I'm happy we did the work, happy with the results, and would do it again but not with these type of bars because of the difficulty of routing the wires through them. A 90 degree down turn or rounded down turn on the bars would have still looked good and prevented all of the major problems we had with installation. They do look good though, ride well, and I am happy with the final result.

Stock Handlebars


Paul Yaffe 14" Monkey Bars


How to Install Paul Yaffe 14" Handlebars on a 2012 Street Glide Video


Tuesday, March 17, 2015

Whats Happening This Coming Weekend?

Very good question! For over a month I have been collecting all of the parts necessary to install new 12" handlebars on my Street Glide. As you can imagine I'm pretty excited about that. Handle bars are one of those high expense items that is sometimes difficult to follow through with purchasing. Between the cost of the bars themselves and all of the necessary extensions, most riders will not even attempt self installation. Paying to have it done will greatly increase your cost on this project.

I will be putting together a video of the process. There is a LOT that has to be done to install these on a 2012 model so most of the video will be showing the processes involved with very little detail as to how to perform each process. For instance, the brake lines have to be replaced with longer lines and bled. I won't describe the details of bleeding the lines, I'll just say you have to bleed the lines and a short clip of performing the process. On a positive note, I already have videos to perform a lot of the processes it will take to install the bars already. Bleeding brake lines, removing the outer fairing, removing the ignition, removing and lubricating the clutch cable, and adjusting the clutch cable are all videos I already have available which will pertain directly to what will be required to complete the install.

This probably will not be something most people will want to attempt. A lot can go wrong and if each task is not performed thoroughly and correctly it could cause a failure on the road and put the riders life at risk. If you have not worked on bikes in depth for a good amount of time, if you don't have a service manual, if your not sure you have the proper tools, and if your not sure about what parts you need without having to ask, then you probably shouldn't undertake this installation yourself. You really need to be comfortable to the point of not even thinking about it on things like the intricacies of performing a full brake job, or clutch adjustment both from the clutch basket to the cable, some in depth knowledge of wiring, and just the overall comfort and confidence of tearing down and rebuilding a lot of the mechanical and electrical systems of the bike. I'm not trying to discourage anyone, I'm putting the realistic situation out there.

I'll go into more depth when I post the video on the processes necessary to accomplish this project from start to finish but here is a list of parts that have to be changed out to make this happen on the 2012 Street Glide. The processes to change them out is where it can get difficult.

I went with Paul Yaffe 12" Monkey Bagger Bars
12-15" throttle by wire assembly
12-15" brake lines including the junction
12-15" clutch cable
12-15" wiring extensions
1 quart 20W-50 Screaming Eagle Syn3 oil
Snap ring for pivot pin on clutch
O-ring for transmission drain plug
O-ring for clutch cable
Clutch cover gasket
Dot 4 Brake Fluid

It will take about a week to compile the video, write the post, and get pictures up once its complete so check back in a couple weeks!

Ride Strong Ride Safe


Friday, March 6, 2015

How to Install Slip-Ons on a 2013 Harley Davidson Softail Deluxe

This is another one of those easy to do upgrades but sometimes getting a visual before you begin can be of help.

Slip-ons are a cost effective and easy way to give your bike more of the sound you want. They are also an important part of the aesthetics of the bike and most people want to add some form of customization to personalize it.

Another great point of slip-ons is you don't usually have to perform any stage-1 upgrades. Slip-ons are designed to replace only the muffler on the bike, not the entire exhaust from the cylinder head. If you do decide to put straight pipes on the bike for example, this would require you to perform a complete stage-1 upgrade along with the exhaust and bring your cost to well over $1000 in most cases. This post is not going to cover the particulars of a stage-1 upgrade since we don't have to do that in the case of most slip-ons. If you want a very good detailed outline of what a stage-1 upgrade consists of the following link will give you more information than you probably want to know.


There are I would say three main reasons people put slip-ons on their bike.
1- Visual customization
2- Improved Sound
3- Cost over a complete exhaust upgrade

Visual- There are a LOT of slip-ons out there from various manufacturers and before making any hasty decisions you might want to take a few days to explore the options. If not, you have a good chance of running into regret the next time you go to a bike event and see someone else's slip-ons and wish you had gotten theirs instead. Again, take your time, do some research, try to get an idea of what your wanting your bike to look like as a whole, not just at the muffler level.

Improved Sound- This point is more difficult than the visual. You simply won't know what they sound like by seeing them online or even on the shelf at a bike shop. Again, take your time and start listening to other bikes at events. When one rolls by with the sound you like ask the rider what type of slip-ons or even complete exhaust upgrade they performed. Doing this will help you make the right choice without regret. Slip-ons have a great degree of sound difference. A lot of our HOG Chapter will put Rinehart's on their bikes which give it a loud snapping, crackling sound. I went with Vance & Hines 4" rounds which have deep rumbling tone. Even within the same manufacturer, a different style can have a different sound so it's best to listen to a bunch of them first preferably on the same bike you have.

Cost- Most slip-ons can be purchased for under $800 all the way down to a couple hundred dollars depending on the bike and manufacturer. Because they are only replacing the muffler, in most cases you wont have to perform that stage-1 upgrade which will push your cost well over $1000 dollars. Be sure to do some research first thought. A stage-1 upgrade becomes necessary because of the change in back flow from the exhaust. If your'e putting a slip-on on the bike that has very little internal mesh or baffles that don't allow for some back pressure, you could still find yourself having to perform a stage-1 upgrade. A little research can go a long ways in preventing this from happening.

Also some people change their stock mufflers for slip-ons is in regards to performance. Each manufacturer claims their slip-ons will increase horse power. Its usually not by much, but you will get a small horse power boost because typical slip-ons will allow easier exhaust pass through. Keep in mind that the horse power gain will be very minor and you probably won't even notice a performance difference.

One last item of importance. If your'e putting on chrome slip-ons, be sure to clean the chrome thoroughly before starting the bike. If there is any residue such as oil, fingerprints, grease, etc. on the chrome and you start the bike, the heat will burn those spots into the chrome and you won't be able to get it out!

How to Install Slip-Ons on a 2013 Harley Davidson Softail Deluxe


Monday, March 2, 2015

Tools for the Road!

Tools for the road! To carry or not to carry? I usually only carry them if were going to be out for the day or longer. When I ride to work though I don't carry tools due to the fact that I'm not going to be anywhere remote where I can't get help. Everyone has an opinion of whether or not they should bother carrying tools. They will add a bit of weight and take up some space. With careful purchasing and planning of your tools you can minimize both of these impacts so that its nearly unnoticeable.

While with our HOG Chapter and with other groups I have seen a few instances where a rider was able to continue on because of the forethought of our Road Captains bringing tools. If they hadn't brought tools, the rider would have had to wait for a tow truck to haul their bike away.

On one occasion a riders floor board fell off because the bolt holding it on came out while he was riding down the road. One of the road captains stopped with him while the rest of the group continued on to the next stop. Fortunately they retrieved the floor board from the side of the road. They didn't have a bolt for it but the road captain had a small spool of bailing wire, pliers, and wire cutters and managed to wire it back on so he could continue the ride.

Another instance occurred on a 911 memorial ride. We were about to leave the fire station, and one bike wouldn't start. After some basic diagnosis the road captains thought the carburetor might be flooded. They pulled out some tools from a saddlebag, pulled the spark plugs, cranked it a few times with the spark plugs out, the excess fuel came out, they put the spark plugs back in, and it started right up.

One other time a rider lost a bolt that held one side of his windshield on. He rode up holding the windshield so it wouldn't fall down. Even though no one had a bold to replace it, one rider had some zip ties and he used those through the windshield and the bolt hole. It worked great and he was able to ride the rest of the day with the windshield attached with zip ties. Was it a perfect fix? No, but it got that rider through the day.

These were small issues and easily fixed but only because our road captains keep some basic tools with them on rides. You won't be able to do major repairs but the tools can certainly help in a lot of cases and with some creativity to get you back on the road enough to get the bike to a shop or home where proper repairs can be made. I know some people say they will just call for a tow and that's fine, but I would much rather have a chance to repair a minor problem than be sitting on the side of the road waiting for hours and dealing with the inconvenience of a tow. And if I don't have the ability to make a repair, then as a last resort call the tow truck. I've seen new bikes with only a couple thousand miles on them breakdown and I've seen bikes with thousands of miles break down. It can happen at any time to any bike.

I have a set of tools that I compiled just for putting in my saddlebags. They were not very expensive and with thoughtful shopping you can have a somewhat compact tool set that won't require much space. I broke my set into two units, a socket set for one saddlebag, and miscellaneous tools for the other. I found a super nice heavy material small tool bag at Harbor Freight for $5.00 for the miscellaneous stuff. Outside of tools I am able to carry a spare turn signal bulb, a quart of oil, a small spool of bailing wire, zip ties, and paper funnels. When we took our 11 day trip to the Blue Ridge Parkway I took all of the tools that will be mentioned below. If you look at the pictures of my bike in the slideshow from that trip you would never know there were that many tools plus clothing, shoes, camera, video equipment, thermos, and rain suite in the bags of my bike.

Here is a link to a downloadable list: What to pack checklist

Here is a list of tools I pack:
SAE Socket & Ratchet set= includes deep set sockets, spark plug socket, extensions
Torx sockets
Crescent wrenches- 2 sizes
Screwdriver- Multi-point interchangable tips
Allen Wrenches- Both SAE and Metric
Channel Locks
Bailing Wire
Paper Funnels
Spare turn signal bulb
Quart of oil
WD40 Lubricant
Wire cutters
Zip Ties
Air pressure gauge
Glow sticks
Utility Knife
Spanner Wrench
Electrical Tape


Monday, February 16, 2015

Homestead Heritage Farms 2015

A couple weeks ago the weather became favorable for a decent afternoon ride. We decided to take advantage of that bit of warmth and make it count in two ways. Riding and seeds! Seeds? Exactly that!

Margaret and I have been growing our own vegetables and herbs for over 10 years. The greatest success to our gardens have been due to our choice of seeds. It took awhile to understand that the best seeds are not the ones found in packages at your local garden store. Those seeds could have come from veggies from an entirely different region of the country, from different soil conditions, climate, elevation, etc. Which means their not acclimated to where we live.

We found Homestead Heritage many years ago and have attended seminars there to educate ourselves better about gardening. They grow their own crops and harvest the heirloom seeds from the strongest of the plants each year. This is often referred to as Seed Saving. By saving the strongest of the seeds from your crops the plants will become stronger and more acclimated to your local area based on temperatures, water, soil, and a whole bunch of other factors. If you diversify your crops to include many varieties of tomatoes for example, then you further strengthen the sustainability of your crops. For now we still purchase their seeds but we have begun saving our own with the purpose of eventually completely using our own seeds.

I don't want to turn this site into a political forum but I do want to mention something about seed saving and genetically modified foods (GMO's) since I have written about Healthy Living for Healthy Riding. It's very difficult in our world today, especially in the USA, to eat food that is healthy. I'm not talking about just eating healthy, I'm talking about whether the content of the healthy food you consume is healthy. A company named Monsanto is at the forefront of genetically modified foods. The Institute for Responsible Technology has an excellent write up on why GMO's are bad for you and I included the link instead of trying to explain it all here. There is also a LOT of funding by some of your popular companies such as PepsiCo for example that are strong advocates for the use of GMO's. Purchase a PepsiCo/Frito Lay product and you have become a supporter of Genetically Modified Foods. Congratulations.

What you purchase to eat can be healthy if you take the time to do a bit of research. I want to live a long life and be able to enjoy riding for as long as possible. A wonderful website called Eat Local Grown lists companies that do not use GMO products in their foods. They also list the companies that support GMO's and some products on the shelves associated with those companies for you to avoid.

GMO's are banned in Europe but unfortunately GMO's are still allowed in the US. I think everyone wants to eat healthy, live a long life, and in our case, ride a long life. What you put into your body is a primary factor in that goal which is one of the reasons we purchase our seeds from Homestead Heritage and grow our own garden.

Live Healthy, Ride Longer


Monday, February 2, 2015

Winter Down Time

If you follow my blog it's clear we haven't been very active of late. Even in Texas we become victims at the mercy of the weather. For the past few weeks between some rain and cold temperatures we have been confined to driving instead of riding. There have been sporadic breaks where we have gone on a very short, and I do mean very short, 5-10 mile rides for a quick lunch. Last weekend was decent and we participated in our Chapter's Freeze Yer Bunz Ride. It wasn't freezing though which I am thankful for. A couple days throughout the week I was able to ride my 120 mile round trip commute to work and back. But for the most part, no riding. On top of the weather, the end of the year brought about funding at work that had to be spent by years end so we fired up more construction projects which inevitably causes me to have to put in some weekend work. The overtime is nice though and its at a good time of the year since it doesn't interfere with our riding plans too much.

So what do we do that is somewhat riding related during these seasonal times? I've spent a bit of time optimizing my tools for the road that I keep in my saddlebags. Basically trying to limit the space they take while still having a good set of tools for breakdowns that could occur. I've been working on a post about tools for the road and once I'm happy with my tool setup I'll get that posted. We still check our tire pressure every week, not just to keep in good habit but keeping the tire pressure correct will prolong the life of your tires.

Margaret bought a couple shifter decorative parts for my bike at Christmas and my birthday which we installed on a somewhat decent weather day and did a couple of short videos that we hope could be helpful to someone. It was still cold while installing them so we kept the garage doors closed and used our shop lamps to generate some warmth.

Margaret has been wanting louder sound on her Softail so I bought her some Cycle Shack slip ons for Christmas and we installed those this past weekend and put together a video on the process and a before and after of the sound difference. Their loud! Like seriously, LOUD! Her bike now makes my Street Glide sound gimp. It's all good though, she loves the way it sounds now and that was the goal.


One particular upgrade I've been wanting to do to my bike since getting it was some longer handlebars. The stock ones are just a bit too low for comfort and on longer rides I will sometimes get a pain between my shoulders from having to lean forward slightly. We were at our local dealership this weekend and there was a set of 12" Arlen Ness handlebars on a new Street Glide that I really liked. They felt great when sitting on the bike. We went to the parts counter and found that particular handlebar was on back order because of its popularity. BUT, they had one set which was the display that they sold me. Now I am slowly going to purchase all the other parts necessary to install them since the cables and wiring on the stock bike will be too short. That means clutch cable, brake lines, electronic controls, and throttle by wire will all have to be replaced. There will be quite a bit of tear down to make it all happen and well do a video on the process when I get all of the parts and a nice full day of good weather.

We did a few videos lately as well that I linked on the maintenance page. How to install slip ons, changing spark plugs, installing a shift lever, and lubricating throttle cables. We try to keep new helpful content rolling out.

That's about all for now. We do have a Sweetheart ride with our Chapter coming up on Sunday that well take part in. So if your not doing anything and have a sweetheart you would like to take on a ride then saddle up and head out with us!

Monday, January 19, 2015

How to Install a Shift Lever on a 2012 Harley Davidson Street Glide

A shift lever is an easy item to install but sometimes it helps to see one done before you do it yourself. There are a couple of considerations to take into account and that's why I decided to make this post and video.

The first thing to consider is the toe shifter. If its installed to low you wont be able to get your toe under it to shift into a higher gear. Also, if its too low it might hit the floor board when you push down on it causing you not to be able to shift into a lower gear. If your'e planning on using your toe to shift into a higher gear you also need to consider how much movement you have in your ankle as well. If the shift lever is too high your ankles range of motion may not be enough to make that shift, leaving you to have to lift your foot off the floor board to shift fully.

Secondly, the heel shifter. Though you don't have to worry about getting your toe under it, if its installed to low The shift peg might hit the floor board and not be able to shift into a higher gear properly. The other consideration on the rear shift lever is to be sure its high enough so that if you drop your bike the floor board wont fold up and hit it which could damage the lever or the shift peg. Before you put the bolts in to tighten it, lift up on the floorboard to see if the lever is high enough to be unaffected in the event of a fall.

How to Install and Adjust a Shifter on a 2012 Harley Davidson Street Glide

Friday, January 2, 2015

Malorie's Law is Law

I've been reading about the new motorcycle passenger safety law that has passed Texas State Legislature. The law was passed after the last legislative session in 2013. It came into being after an accident from which Malorie Bullock, a college student who was a passenger on a motorcycle was killed in a crash. There are multiple articles about the accident if you do some Google searches on the topic but you can read one of the articles about it here. Student killed in motorcycle accident. As of January 1, 2015 the law applies to Texas motorcyclists.

So what does this law do and how will it affect motorcyclists? That primarily depends on what type of motorcycle you ride. Cruisers, touring bikes, and motorcycles that you sit upright on will be mostly unaffected. Sport bike riders however may have to make some accommodations for their passengers. It seems to me after reading the new law that the state is simply wanting riders, and passengers, to take responsibility for having passengers on bikes. If you want to have a passenger, the bike has to have been designed to carry more than one person, passengers must have handholds, and they must have foot pegs to put their feet on. All of this seems completely reasonable to me. Everyone I know that rides as a passenger have these basic items for safety and comfort.

Below is the new law that you can read for yourself and figure out if you and your passenger will be affected by it or not. Read through it and then explore some of the particular concerns I have afterwards. I agree completely with the new law, if you have a passenger.....

-----------------------------------------------------------------------------------------------------------
text of the bill -
By: Phillips H.B. No. 2470

A BILL TO BE ENTITLED
AN ACT
relating to the regulation of sport bikes and certain other
motorcycles.
BE IT ENACTED BY THE LEGISLATURE OF THE STATE OF TEXAS:
SECTION 1. This Act shall be known as Malorie's Law.

SECTION 2. Section 521.084, Transportation Code, is amended
to read as follows:
Sec. 521.084. CLASS M LICENSE. A Class M driver's license
authorizes the holder of the license to operate a motorcycle,
including a sport bike as defined by Section 541.201, or a moped.

SECTION 3. Section 541.201, Transportation Code, is amended
by adding Subdivision (18-a) to read as follows:
(18-a) "Sport bike" means a motorcycle:
(A) that is optimized for speed, acceleration,
braking, and maneuverability on paved roads;
(B) that has a lightweight frame;
(C) on which the operator leans forward over the
gas tank during operation; and
(D) that is not a touring, cruising, standard, or
dual-sport motorcycle.

SECTION 4. Subchapter I, Chapter 545, Transportation Code,
is amended by adding Section 545.4161 to read as follows:
Sec. 545.4161. OPERATION OF SPORT BIKE. (a) In addition to
the requirements and prohibitions under Section 545.416, an
operator may not carry another person on a sport bike unless the
sport bike is designed to carry more than one person and:
(1) the operator:
(A) is at least 18 years of age; and
(B) has had a Class M license for at least two
years; or
(2) the other person:
(A) is at least 18 years of age and holds a Class
M license; or
(B) is a motorcycle operator training and safety
course instructor certified under Chapter 662.
(b) An operator of a sport bike shall ensure that a
passenger on the sport bike complies with all department
regulations relating to motorcycle safety.

SECTION 5. The heading to Subchapter M, Chapter 547,
Transportation Code, is amended to read as follows:
SUBCHAPTER M. ADDITIONAL OR ALTERNATIVE EQUIPMENT REQUIREMENTS FOR
MOTORCYCLES, [AND] MOTOR-DRIVEN CYCLES, AND SPORT BIKES

SECTION 6. Subchapter M, Chapter 547, Transportation Code,
is amended by adding Section 547.803 to read as follows:
Sec. 547.803. SAFETY EQUIPMENT. If a motorcycle, including
a sport bike, is designed to carry more than one person, the
motorcycle must be equipped with foot pegs and handholds for use by
a passenger on the motorcycle.

SECTION 7. Section 661.001(1), Transportation Code, is
amended to read as follows:
(1) "Motorcycle" means a motor vehicle designed to
propel itself with not more than three wheels in contact with the
ground, and having a saddle for the use of the rider. The term
includes a sport bike, as defined by Section 541.201. The term does
not include a tractor or a three-wheeled vehicle equipped with a cab
or occupant compartment, seat, and seat belt and designed to
contain the operator in the cab or occupant compartment.

SECTION 8. This Act takes effect September 1, 2011.

---------------------------------------------------------------------------------------------------------------------

My only concerns are in regards to SECTION 6 of this house bill.


SAFETY EQUIPMENT. If a motorcycle, including a sport bike, is designed to carry more than one person, the motorcycle must be equipped with foot pegs and handholds for use by a passenger on the motorcycle.

I can see some arising issues for riders dealing with police interpretation on this part.

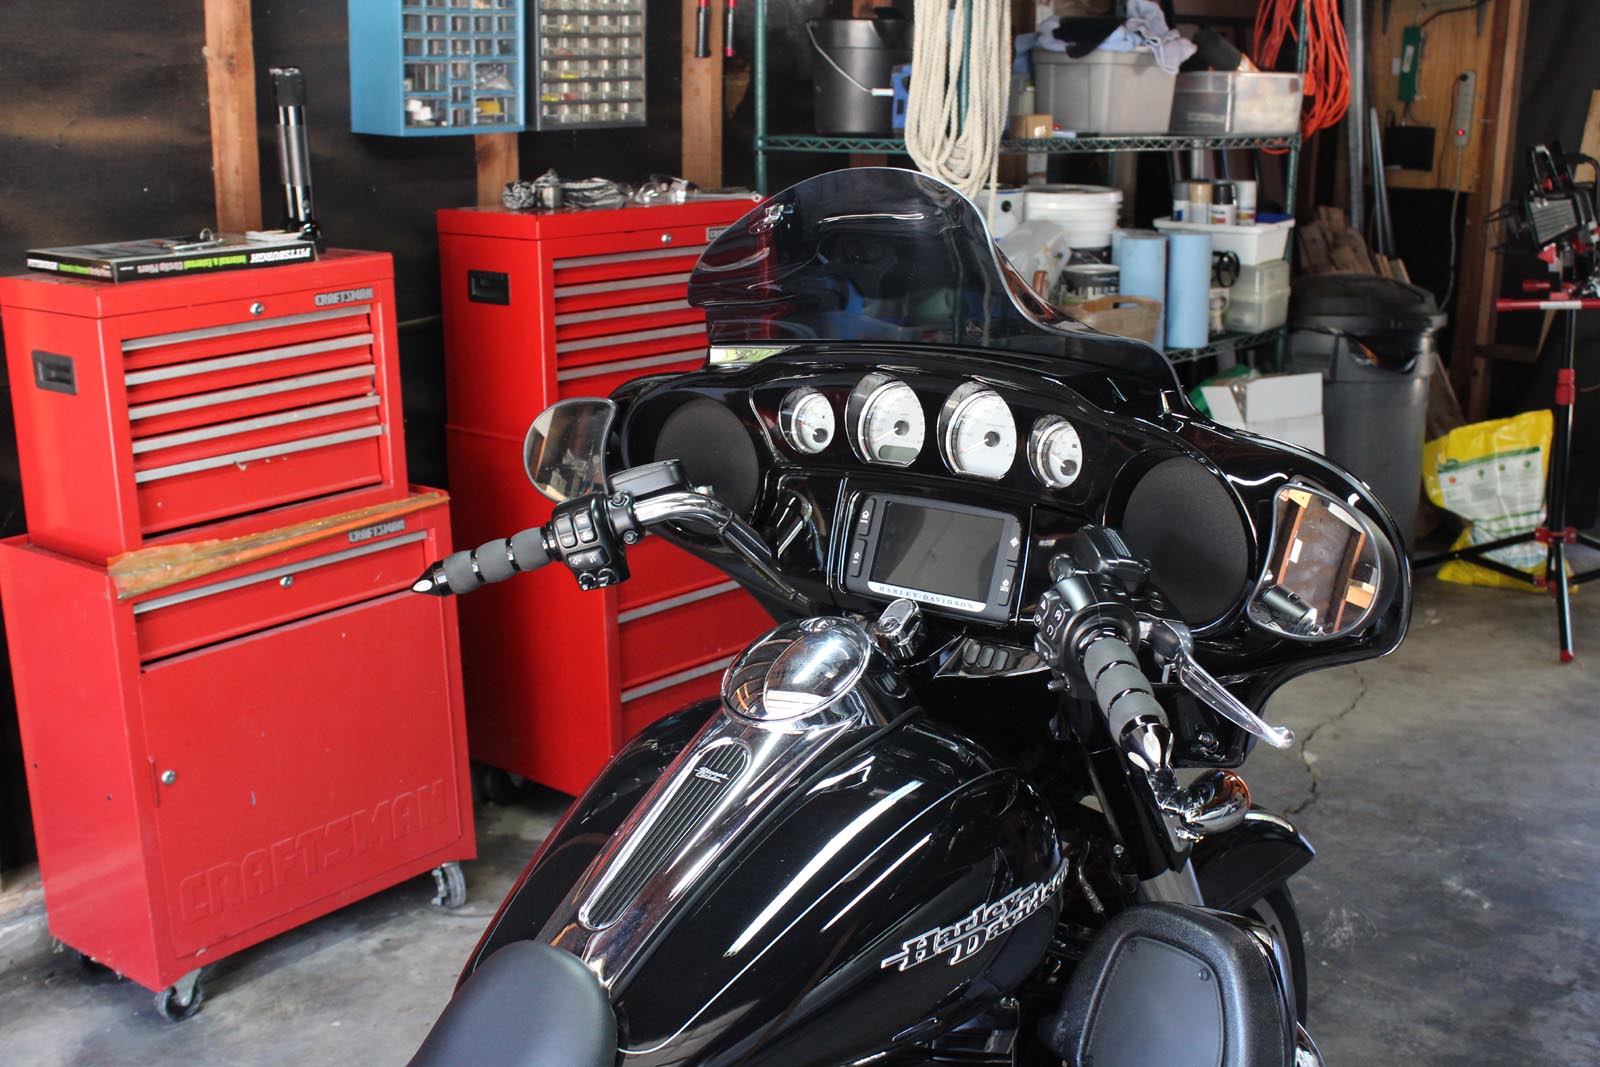
First: What constitutes designed? Margaret for instance removed her back seat and has a fender bib in its place. She also has a different seat from the original that is lower and pushes her closer to the handle bars for better reach. It does not have a handhold on it as the original seat does. She does not and will not carry a passenger. It's unreasonable to assume anyone would ever ride as a passenger sitting on a fender bib anyway. But, if she was pulled over could an officer say the bike was originally designed for a passenger and ticket her because the handhold is missing? Even though she does not have a passenger?

Second: Take the factory Street Glide. It has a small passenger seat with a leather handhold. Your riding along and a cop pulls you over. Is it up to the officers interpretation as to whether that is a legitimate handhold or not?

Third: What if I'm riding without a passenger and have no footrests on the bike? Am I violating the law even though I have no passenger to put at risk? In my opinion, if there isn't anyone on the bike with me it shouldn't matter if I have handholds or foot pegs.

I want to assume police officers are going to be reasonable about this and are going to enforce the law when there is a clear concern for a passengers safety. They could just as easily make you have a very bad day over the particularities of this part of the new law since its not clear. I've met some pretty stupid officers that could blow this up real quick. I've also met some very arrogant, pompous cops that want to push their badge around in the attempt to force you to respect them who could use this to cause you grief. Prejudice cops could also become a very serious problem for bikers and use this as a way to bully a rider.

Any thoughts on this?

Ride Strong, Ride Safe